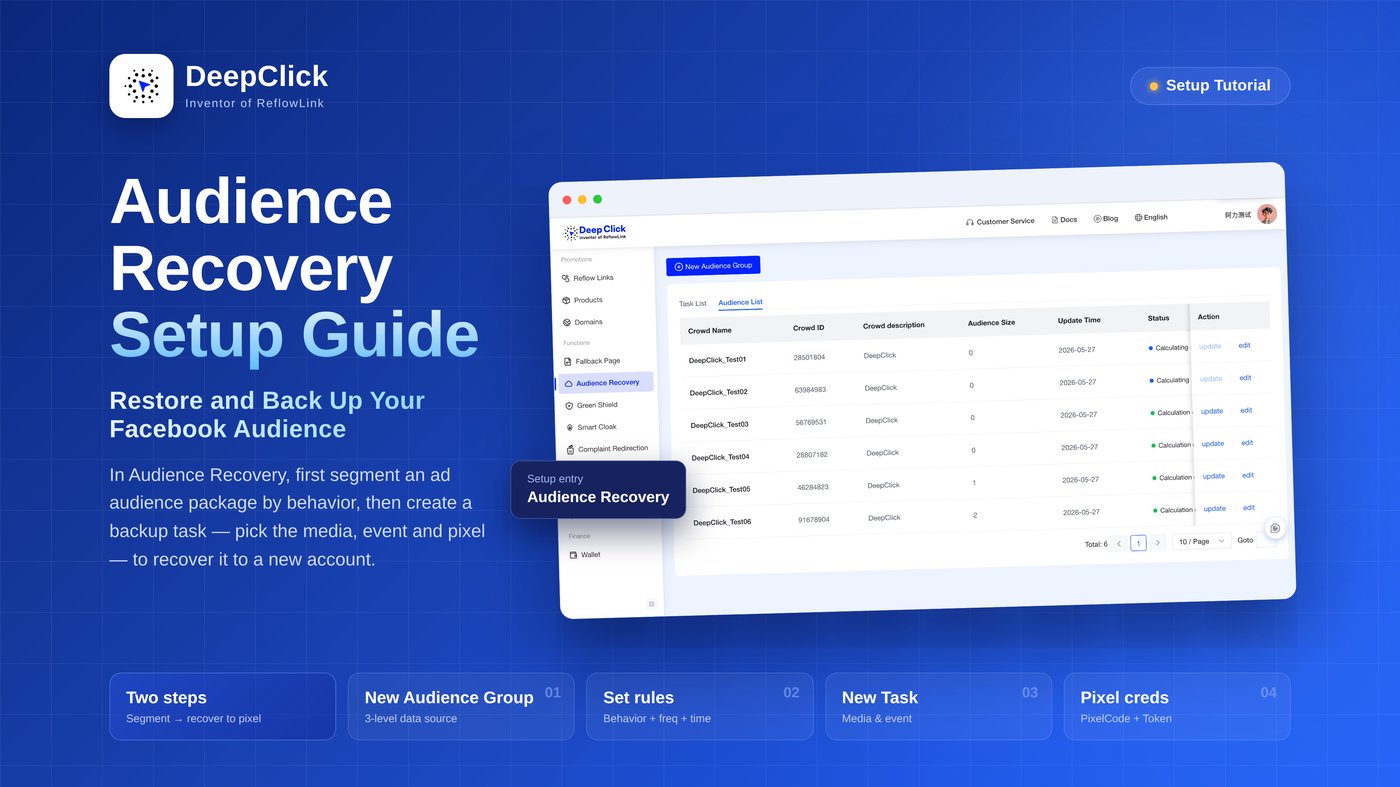
Audience Recovery Setup Guide: Restore and Back Up Your Facebook Audience

This guide walks you through the full Audience Recovery setup in DeepClick: first segment an audience package from your real reflow data, then create a backup task that recovers it to a target media pixel.
⚡ In short: first segment an audience package by behavior, then create a backup task to recover it to your target pixel — two steps.
New to Audience Recovery? See the Audience Recovery Overview.
Part 1: Segment and back up an ad audience (New Audience Group)
Step 1: Open the Audience Recovery module
Log in to DeepClick. In the left navigation, under the "Functions" group, find Audience Recovery.
Step 2: Switch to "Audience List" and click "New Audience Group"
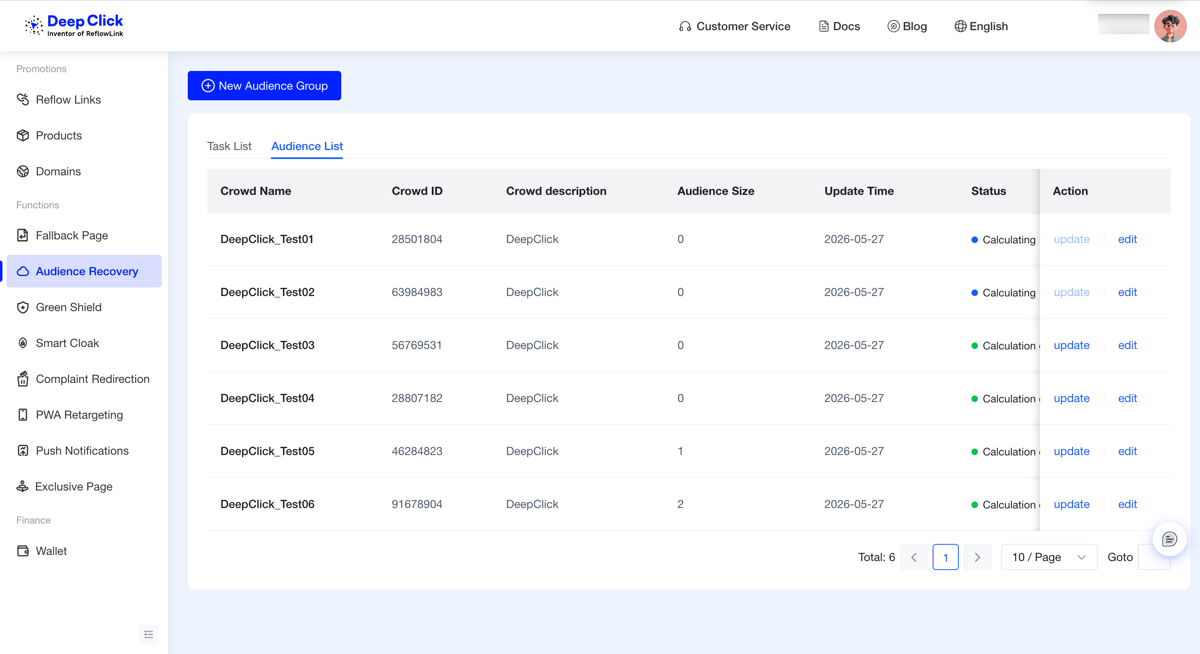
The Audience Recovery page has two tabs: Task List and Audience List. Switch to "Audience List" and click New Audience Group in the top-left.
The Audience List has these columns:
- Crowd Name / Crowd ID / Crowd description — the package's name, system-generated ID, and notes;
- Audience Size — the number of real users currently covered (shown once calculation completes);
- Update Time — the time of the latest calculation;
- Status — Calculating / Calculation Completed: a newly created or updated audience starts as "Calculating", then becomes "Calculation Completed" with the audience size filled in;
- Action — update (available after completion; recalculates the audience size with the latest data) / edit (modify the audience rules).
Step 3: Configure the audience rules
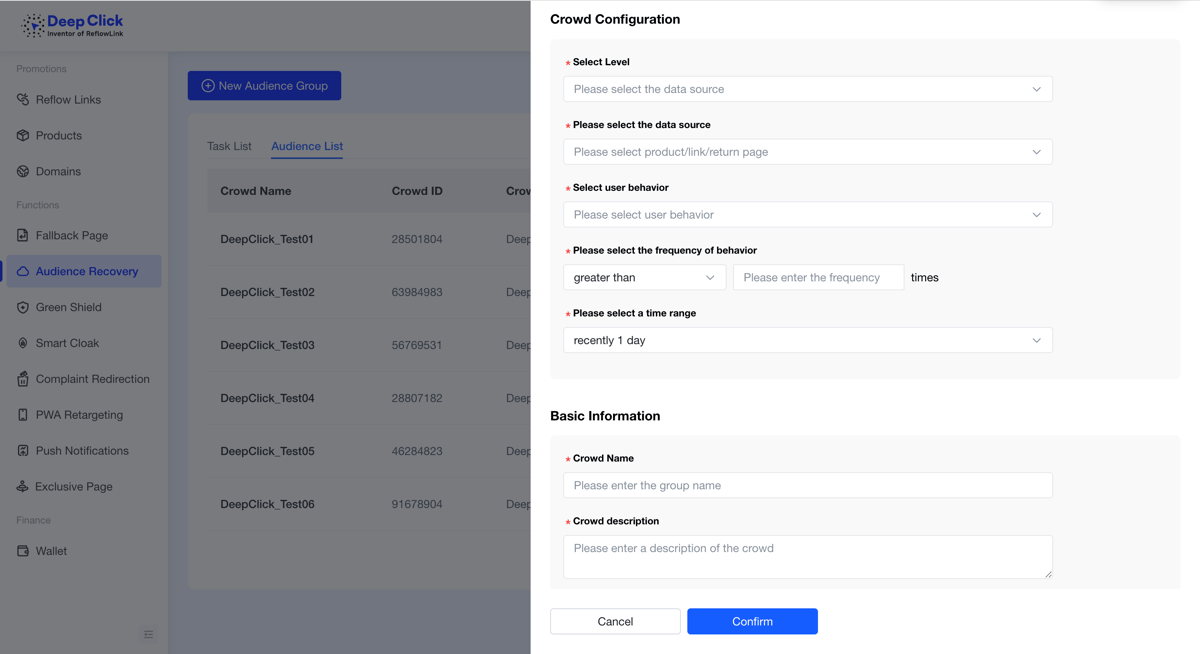
In the "New Audience" panel, segment the audience in this order:
|
Field |
Description |
|---|---|
|
Select level |
Choose one of "Product / Reflow Link / Fallback Page" to set the data scope |
|
Select data source |
Based on the level above, choose the specific product / link / page (Product supports multi-select and shows the AppID) |
|
Select user behavior |
Reflow impression / Reflow click / Link visit (options load based on the data source) |
|
Behavior frequency |
Set a frequency condition, e.g. "greater than N times" |
|
Time range |
Choose the time window to measure (default: Last 1 day) |
Example: set level to "Product" → tick a product → set user behavior to "Reflow click" → frequency "greater than 3 times" → choose a time range. This segments the real users who clicked through reflow more than 3 times on that product in the period.
Step 4: Fill in the basic info and confirm
Under "Basic Info", enter the Audience name and click Confirm.
The new audience appears in the Audience List with status "Calculating" first, then "Calculation Completed" with the audience size shown. You can later use update to recalculate with the latest data, or edit to adjust the rules.
Part 2: Recover the audience to a media pixel (New Backup Task)
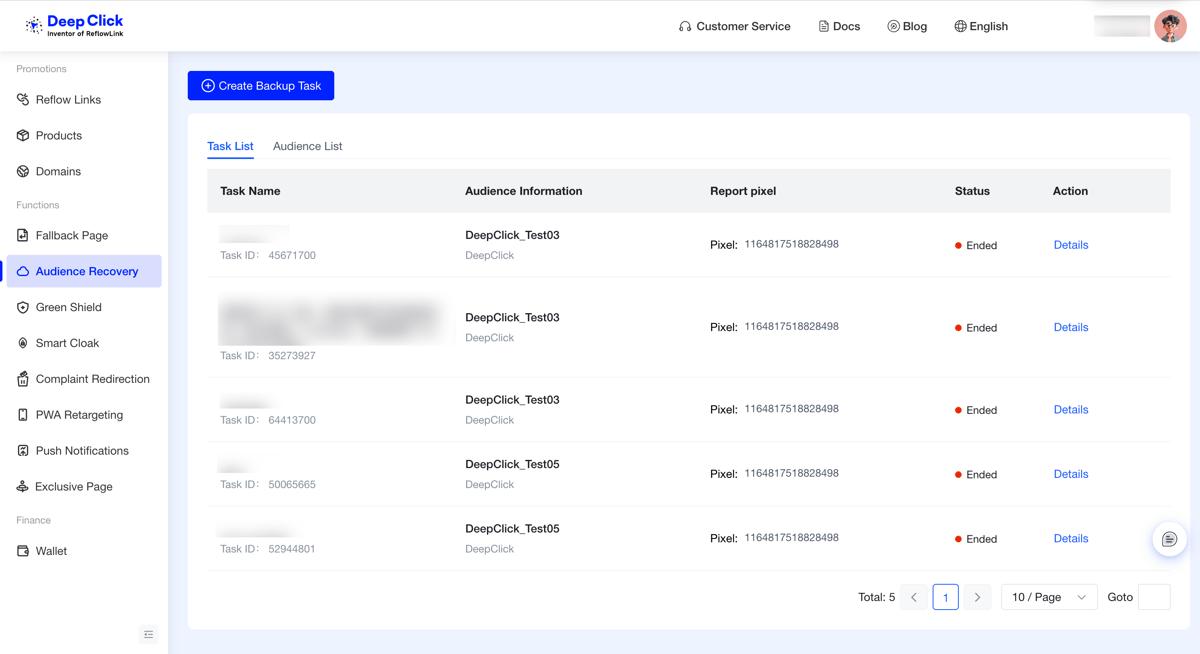
Step 5: Switch to "Task List" and click "New Backup Task"
Switch back to the "Task List" tab and click New Backup Task in the top-left.
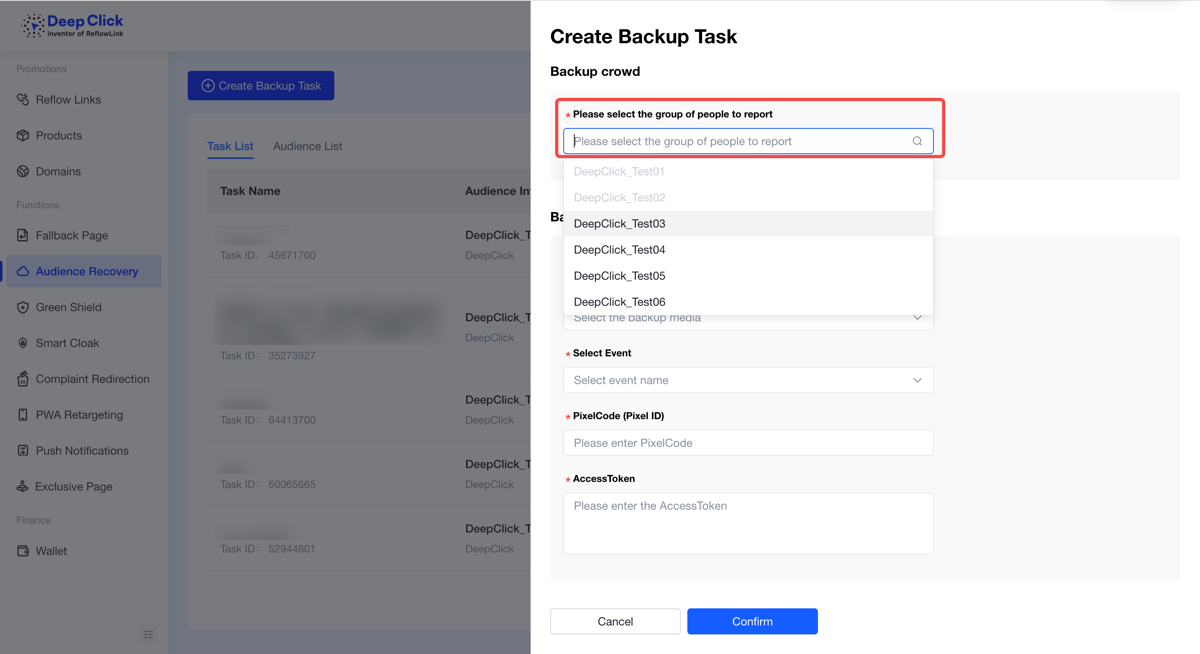
Step 6: Select the audience to report (Backup Audience)
In the "Backup Audience" section, pick the audience package you built in Part 1 from the Select the audience to report dropdown.
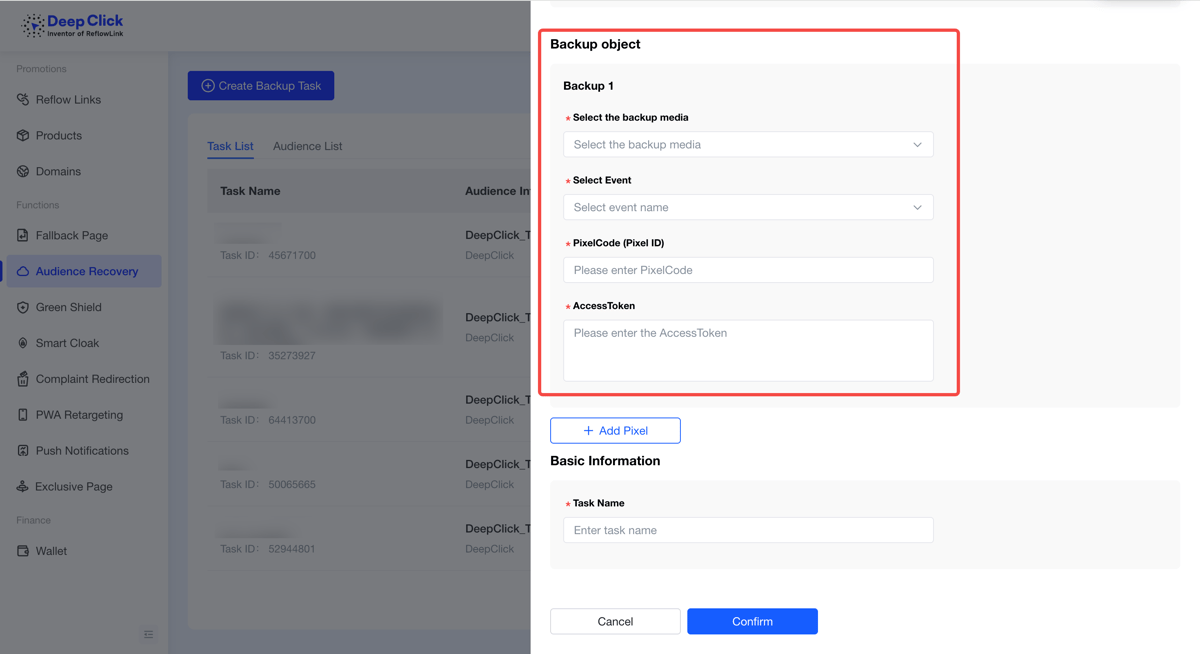
Step 7: Configure the backup target (Backup 1)
In the "Backup Target" section, fill in one target:
|
Field |
Description |
|---|---|
|
Select media |
Facebook is currently supported |
|
Select event |
Which standard event the audience is reported as (e.g. Purchase, CompleteRegistration, AddToCart) |
|
PixelCode |
The target pixel's ID |
|
AccessToken |
The access token for that pixel |
To recover one audience to multiple pixels, click + Add pixel to add another backup target.
Step 8: Name the task and confirm
Under "Basic Info", enter the task name and click Confirm to submit.
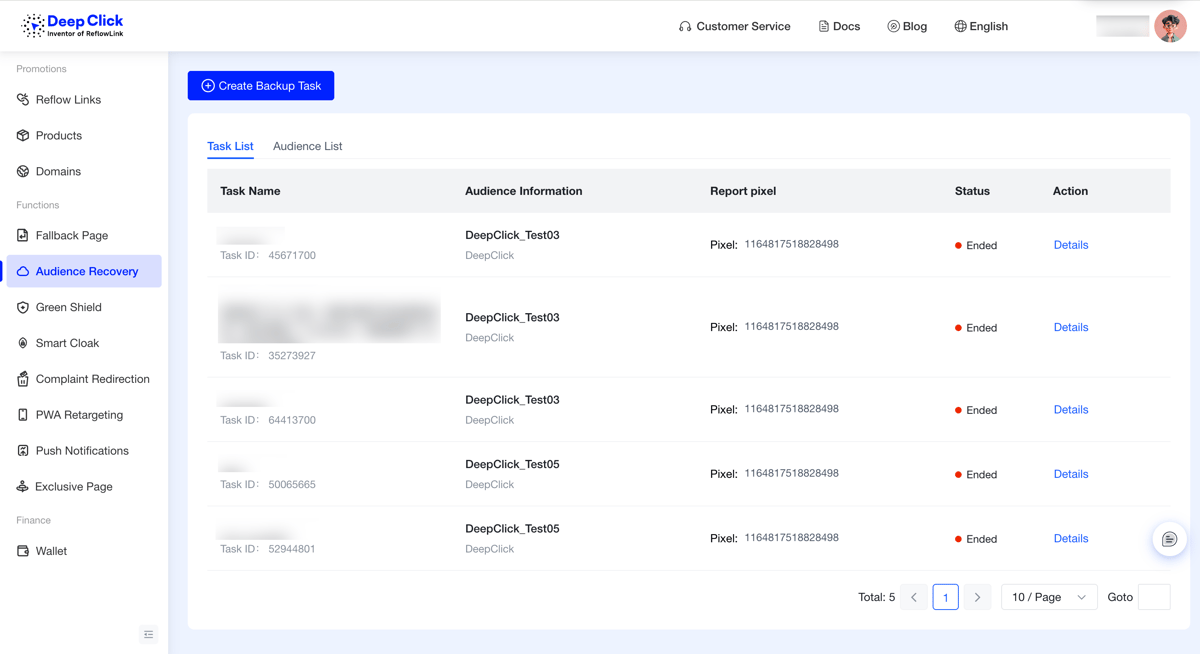
Step 9: Review in the Task List
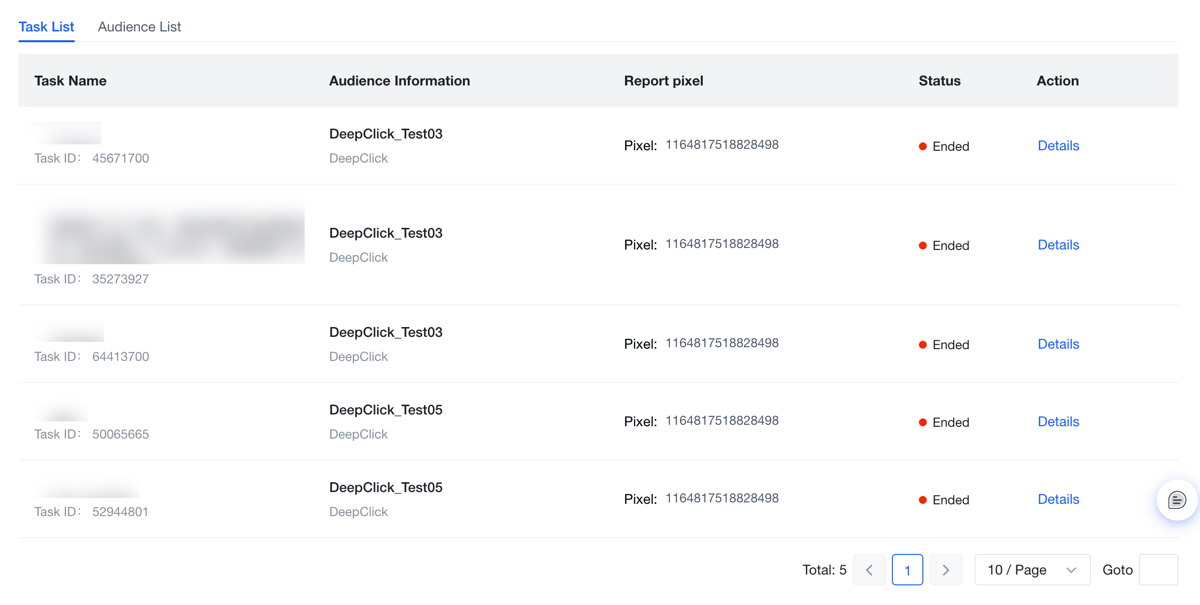
After submitting, the backup task appears in the "Task List", where you can see:
- Task name (with task ID);
- Audience info — the audience name and description this task recovers;
- Reported pixel — the target pixel (Pixel: ID);
- Status — the task's current status;
- Actions — click Details to view the full task configuration (read-only).
Wrap-up: get your pixel credentials and start
The key to setting up Audience Recovery is having your target pixel's PixelCode and AccessToken ready — both come from your pixel settings in Meta Business. Once you have them, the two steps above back up and recover your audience to a new account.
If you're unsure about level selection, event mapping, or pixel credentials, reach out to DeepClick business support for one-on-one help.
Want to understand the value and the logic behind Audience Recovery first? See the Audience Recovery Overview.
