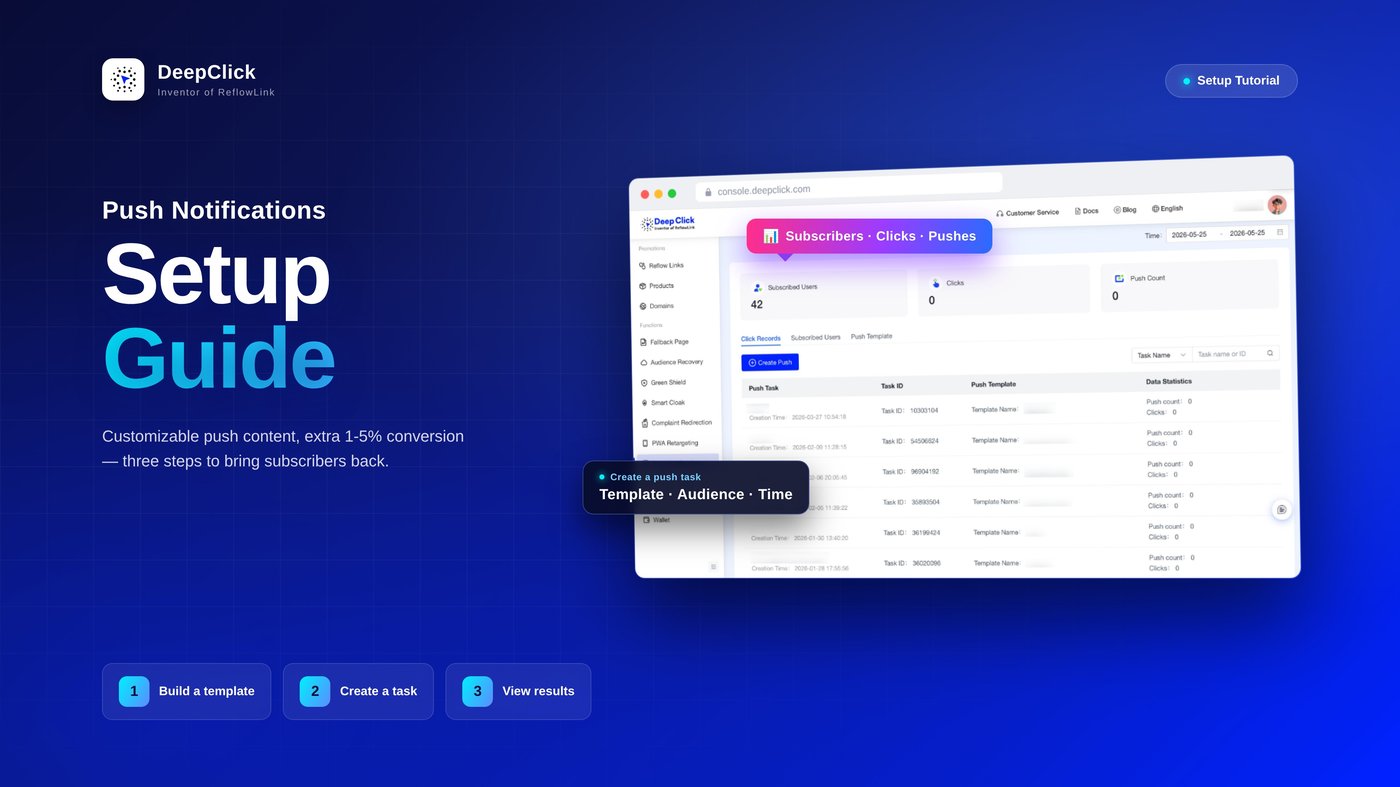
Push Notifications Setup Guide: Customizable push content, Extra 1-5% conversion rate

⚡ TL;DR: In the Push Notifications module, first build a push template (title, content, icon and big image are all customizable), then create a push task — pick the send time, audience and content — and send it. Finally, check the results on the dashboard. Three steps.
📖 Not sure what Push Notifications is or what value it brings? Start here: Push Notifications: Push messages to users who left ads.
Before you start
For Push Notifications to work, your subscriber pool needs people in it first. Before you begin, make sure:
- You have a product: create a mobile-app or web-conversion product in "Products."
- You have a reflow link and it's live: once the reflow link is running, the notification opt-in prompt appears automatically when a user taps it and lands on the page; opting in turns them into a subscriber.
- You have subscribers: you've collected a number of subscribers already. With zero subscribers, a push task has no one to reach.
For the subscription source and billing concepts, see the feature overview.
Enter the Push Notifications module
In the left-hand nav of the DeepClick console, open the "Functions" group and click Push Notifications.
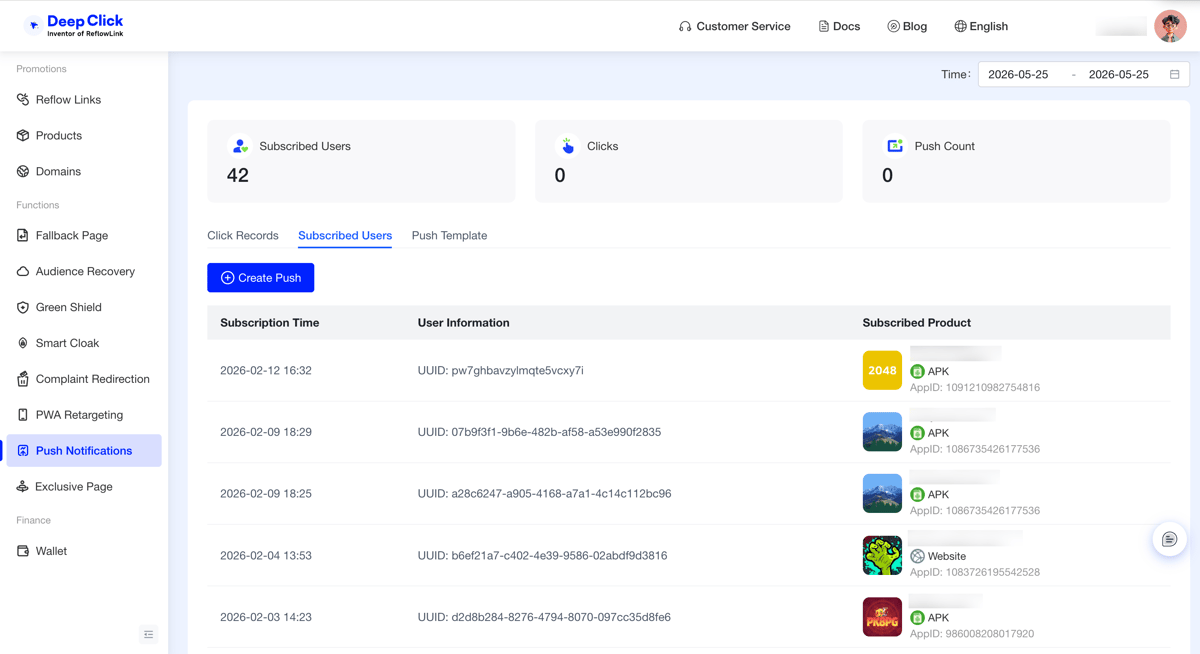
At the top you'll see three stat cards — Subscribed Users, Clicks and Push Count — and below them three tabs: Click Records / Subscribed Users / Push Template. Use the "Time" filter in the top-right to set a date range.
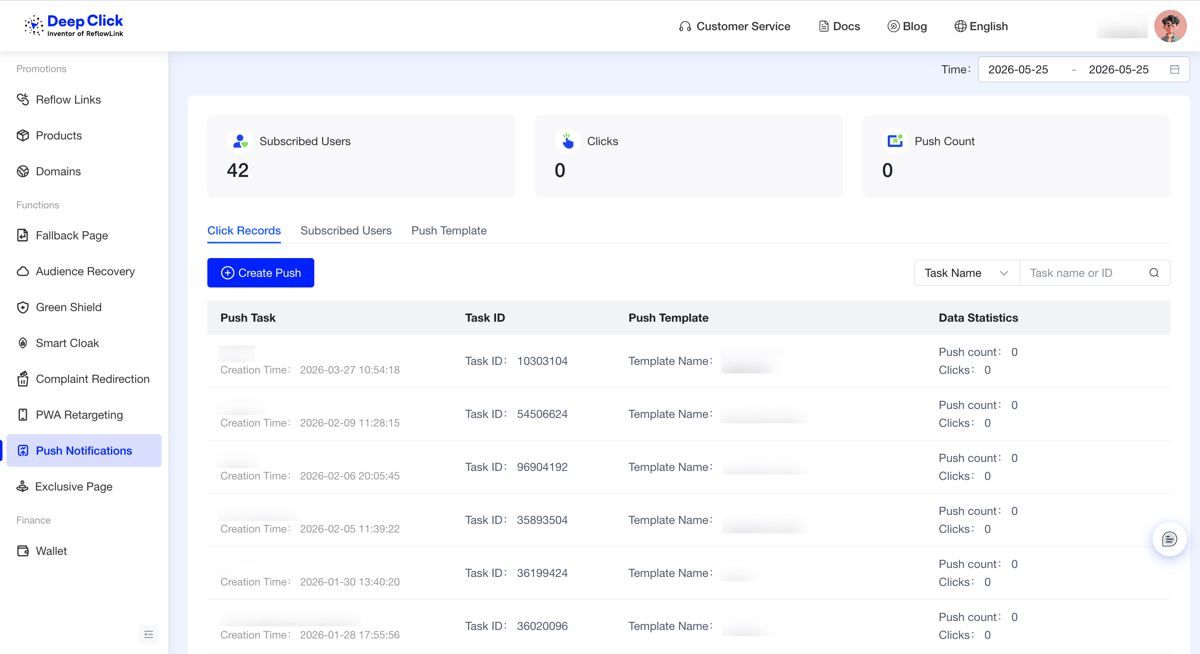
What each tab shows:
- Click Records: a list of all push tasks; each row shows the task ID, the push template used, the push count and the clicks. The "Create Push" button lives on this tab.
- Subscribed Users: details of your current subscribers, matching the "Subscribed Users" total at the top.
- Push Template: your saved push templates — prepare your content here before sending.
Step 1 · Create a push template
The template defines what users see in their notification bar. Switch to the "Push Template" tab and click "Create Push Template," then fill in the fields. The "Push Preview" on the right updates in real time — what you see is what they get.
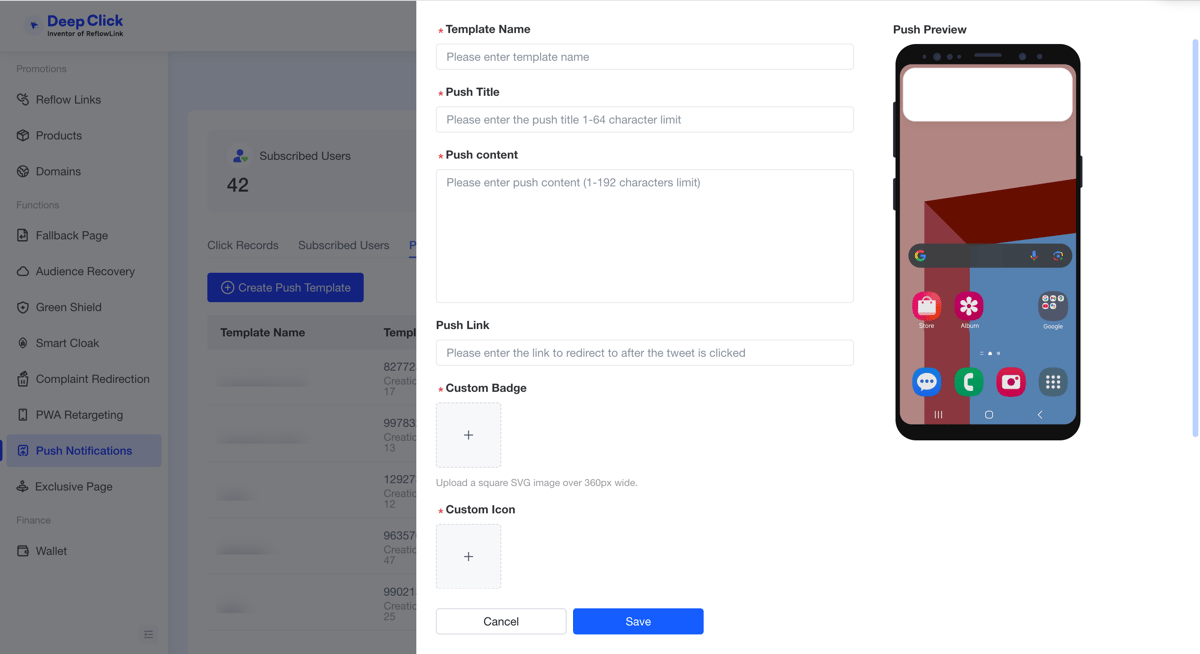
Field by field (* = required):
- Template Name *: for internal management only; never shown to users.
- Push Title *: the headline on the first line of the notification, 1-64 characters.
- Push Content *: the body below the title, 1-192 characters.
- Push Link (optional): the landing page users reach after tapping the push; leave blank to use the default behavior.
- Custom Badge *: the small badge on the notification; upload an SVG, width > 360px, 1:1 ratio.
- Custom Icon *: the app icon shown in the notification bar; upload a jpg / jpeg / png, width > 360px, 1:1 ratio.
- Add Large Image *: the big image shown when the notification expands; recommended 760×360, jpg / jpeg / png.
- Add Button (optional): tick this to add an extra action button on the push.
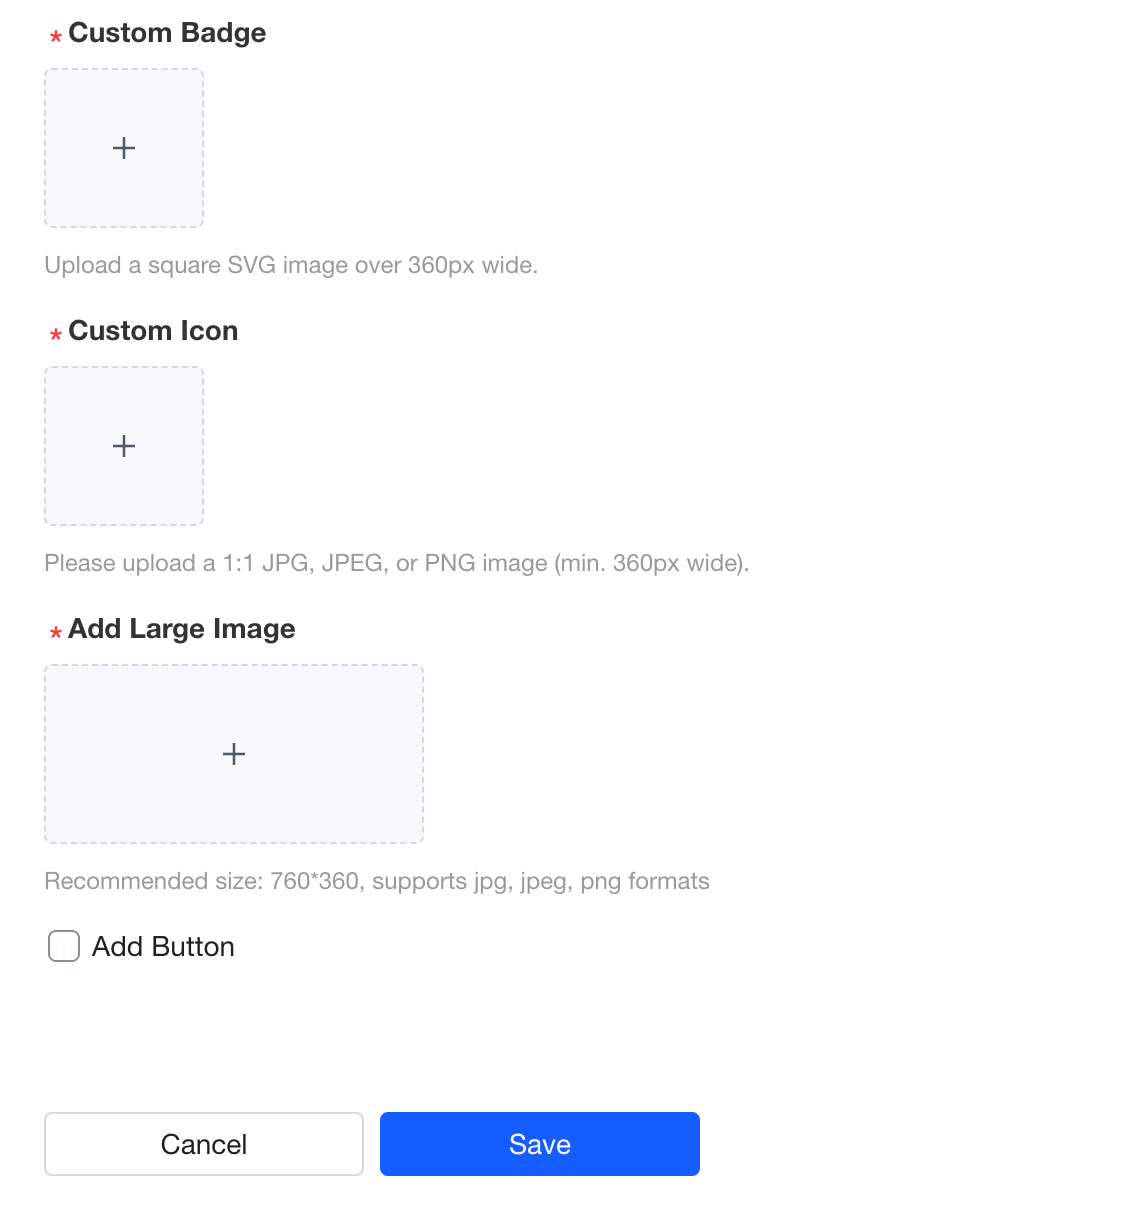
Click "Save" when done. The template appears in the template list and can be reused across multiple push tasks.
Step 2 · Create a push task
With your template ready, go back to the "Click Records" tab and click Create Push, then set each field.
The top of the page shows your current WebPush clicks balance, split by regional tier into Tier 1 / Tier 2 / Tier 3 — valid reflow clicks generated by a push are deducted from the matching regional tier.
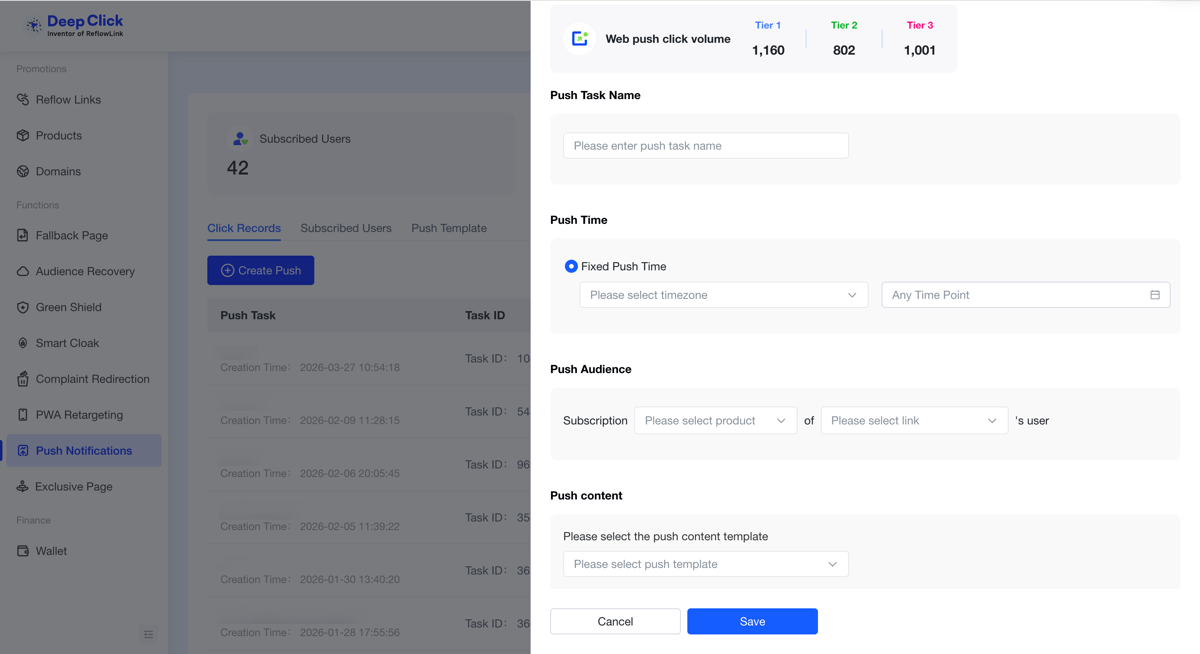
Set, in order:
- Push Task Name: a recognizable name; we recommend a "scenario · purpose" format, e.g. "Black Friday wake-up · promo push."
- Send Time: choose "Fixed Send Time," select a time zone, then pick the exact time point; it sends automatically at that time.
- Audience: define your target as "users who subscribed via [a link] of [a product]" — first pick the product, then the specific reflow link under it; subscribers who opted in through that link become this push's audience.
- Push Content: select a saved push template from the dropdown as the content for this push.
Click "Save" after confirming. The task sends to the selected audience at the set time.
Sending the message itself is free; "WebPush clicks" are only consumed when a user taps the notification and successfully reflows, settled by regional tier.
Step 3 · Review the results
Once a task is sent, the "Click Records" list shows each task's performance: push count (how many users it pushed to) and clicks (how many tapped through and reflowed to your page). The "Clicks" and "Push Count" cards at the top summarize the module's cumulative performance.
By comparing clicks across different templates, audiences and send times, you'll gradually learn which titles, timing and landing pages work best for your users — and keep optimizing the next push.
Appendix: View subscribers
Switch to the "Subscribed Users" tab to see every subscriber's details: subscribe time, user info (UUID) and subscribed product (icon, name, type and AppID). This makes it clear which products and links your pool comes from, so you know exactly what you're selecting when you set the audience in Step 2.
Wrap-up
Push Notifications is light to set up: build a template → send a push → review results, a three-step loop. The template's title, content, icon and big image are fully customizable, and each task lets you target a specific send time and audience. As long as your reflow links keep driving visits and growing your subscriber pool, every push is a near-zero-cost second touch that adds 1-5% conversion to your campaigns.
To revisit how Push Notifications works and where it fits, see:
